Tag Archives: renovation

How to Remove Popcorn Ceilings? A Step-by-Step Guide for Beginners

Popcorn ceilings are a well-known finish that resembles a bubble-like textured surface. They were trendy from the late 1960s to the mid-1990s. This is why homeowners who have had difficulty removing carpet and green tiles in the kitchen now want stucco removal.

Steps to Remove Popcorn Ceilings

The most effective way to remove a textured popcorn ceiling is to use a large paint scraper. However, if you do not follow the correct procedure and do not know the nuances, you can end up with a huge mess.

Here are some practical tips that you can use to remove popcorn ceilings from your home:

  1. Determine if your popcorn ceiling contains asbestos. If you built your home before 1980, there is a chance that your popcorn ceiling contains asbestos. This is a dangerous material that can cause serious health problems. To do this, buy a special test kit or hire a professional.
  2. Gather the right tools. To remove a popcorn ceiling, you will need a scraper, an aerosol can, a ladder, and safety equipment (goggles, gloves, and a respirator).
  3. Clear the space. Make sure the room is empty before removing a textured ceiling. Cover large items that you cannot take out with a heavy-duty tarp.
  4. Disconnect ceiling lights. This will reduce the risk of accidental damage. Secure electrical wires with special wire nuts to prevent electric shock while working.
  5. Protect electrical outlets and light fixtures. Cover them with plastic wrap and masking tape. This blockage will prevent water from entering the outlet and reduce the risk of short circuits.
  6. Protect floors, doors, and windows. Cover all surfaces with a heavy tarpaulin mat and secure it with masking tape.
  7. Wet the ceiling. Fill a spray bottle with warm water and a few drops of detergent and spray the ceiling.
  8. Scrape off the popcorn texture. You can use a wide putty knife for this. Use smooth, even movements to remove the material effectively. You can add more water to make the process easier. Wait 24 hours for the ceiling to dry before moving on to the next step.
  9. Apply a sanding coat and sand. This will help you fill in any gaps and provide a smooth surface. Let the mixture dry, and then sand again to remove uneven areas.

After this, you can prime and paint the ceiling as desired.

Finally, you can remove the mat, put the lamps and fans back, remove the socket covers, and arrange the furniture.

Removing the popcorn ceiling is quite problematic. This process requires special tools and skills. The main problem with removing popcorn texture is the colossal mess it creates. Only professionals can remove popcorn ceilings without dust and dirt. If you’re intimidated by cleaning or need more time, hiring professionals is a great way to solve the problem.

How to simplify the process of removing popcorn ceilings?

If you want to simplify removing popcorn ceiling as much as possible, use the services of professionals from Renovated-Home. Experienced craftsmen will help transform your home into the place of your dreams. Renovated-Home craftsmen use leading technologies to remove textured ceilings. The surface is removed without dust and mess.

The Renovated-Home team works in Toronto and provides the highest professional services. Сraftsmens have extensive experience leveling ceilings, so you will not have to wait long. They will perfectly level the surface and clean up everything after themselves, leaving a clean space in your home.

If you have questions about the cost, request a consultation. Managers will contact you and calculate the cost of work individually, considering the area, ceiling height, and the presence of furniture. Get a free consultation right now. For the Silo, Kristina Rigina.

North America’s Most Famous Photographer Lists California Hideaway

via our friends at toptenrealestatedeals.com.

Annie Leibovitz’s Picture-Perfect California Hideaway Is For Sale

Annie Leibovitz – Self-portrait, c.1990. Auction passed via Galerie Bassenge (Dec 2010).

North America’s most famous living photographer, Annie Leibovitz, had quite the surprise when she bought her 65-acre home and farm in 2019 and learned that North America’s most famous photographer of the 20th century, Ansel Adams, had photographed one of the farm’s barns a century ago. It was the perfect metaphor for her purchase of The Hideaway in Bolinas, California.

Annie Leibovitz – Queen Elizabeth II. Sold for $27,500 usd/ $37,600 cad via Phillips (April 2012).

Leibovitz is renowned for her intimate portraits of celebrities for Rolling Stone, Vanity Fair, and Vogue. She did Mick Jagger, Adele, Linda Ronstadt, Queen Elizabeth II, Bruce Springsteen, The Blues Brothers, and the Barack Obama family.

Her snapshot of John Lennon wrapped around Yoko Ono, taken just a few hours before his death, is one of Rolling Stone’s most famous cover images. And her photos of then 15 year old Miley Cyrus sparked controversy and marked a turning point in the young singer’s career.

Leo DiCaprio with Swan 1997 by Annie Leibovitz

Declared a Living Legend by the Library of Congress, Annie is the first woman to have a feature exhibition at Washington’s National Portrait Gallery. Born in Connecticut and based in New York, the self-described “California Person” purchased a 65-acre home and farm, known as The Hideaway, in Bolinas, California in 2019, hoping to spend more time on the West Coast, where she had majored in photography at the San Francisco Art Institute. But with her three young adult children on the East Coast, Annie has decided to list the property for sale at $8.9 million usd/ $12.8 million cad.

With her new property dating back to the 1800s, Leibovitz spent over $2 million usd/ $ 2,736,000 cad on improvements, which included several structures: a home with four bedrooms, a guest house, a caretaker’s residence, and a converted garage.

The original, vintage rotary dial phone was retained in the renovation.

A previous owner, Hardly Strictly Blue Grass founder Warren Hellman, added a recording studio and a performance venue with a banquet hall to the property.

An equestrian’s dream, the complex has impressive horse facilities, including a 100′ x 200’ all-weather riding arena and a top-of-the-line, seven-stall barn with exposed beams and an attached office. Spectacular rolling hills and verdant pastures provide fodder for horses, cattle, or other livestock.

Last but definitely not least: gorgeous views of Bolinas Lagoon, Stinson Beach, Mount Tamalpais, the Pacific Ocean, San Francisco, and the surrounding countryside add even more allure to the picture.

What might be described as the perfect California location on Bolinas Bay, Bolinas has a small-town atmosphere but is only an hour’s drive north to San Francisco. Known for its reclusive residents, Bolinas is only accessible via unmarked roads. The Hideaway is close to bird and seal sanctuaries, botanical gardens, great spots for kayaking and surfing, and the charming Bolinas and Stinson Beach towns. Almare Falls, one of only two beach waterfalls in the continental United States, is accessible via the California Coastal Trail. Other celebrities hiding away in this uniquely beautiful, secluded area include director Joel Coen, actress Frances McDormand, chef and restaurateur Alice Waters, and Third-Eye Blind frontman Stephan Jenkins.

The listing is held by Alexander Fromm Lurie at Compass. Photo credit: Jacob Elliott, courtesy of Compass.

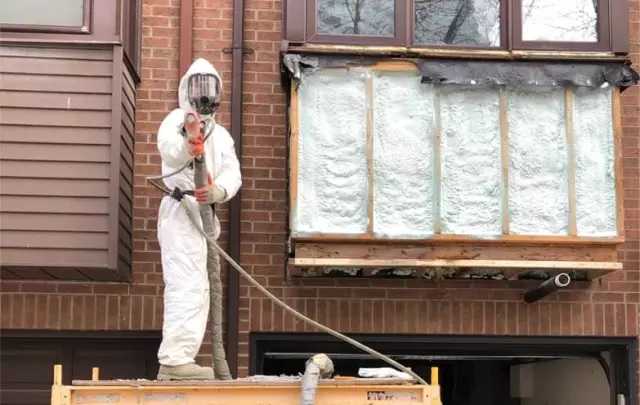
How Do You Make Expanding Foam At Home?

Expanding foam is a versatile material that is commonly used in construction, DIY projects, and home repairs. It is a polymer foam that expands upon application and hardens to fill gaps, cracks, and voids. Expanding foam is useful for insulating walls, sealing leaks, and stabilizing structures. While it is readily available for purchase at hardware stores and home improvement centers, it is also possible to make expanding foam at home. Visit here to learn more.

Making expanding foam at home is a cost-effective alternative to purchasing premade foam. It also allows you to customize the foam to your specific needs and preferences. In this guide, we will walk you through the steps of making expanding foam at home.

Step 1: Gather materials

To make expanding foam at home, you will need the following materials:

  1. A mixing container
  2. A stirring stick
  3. Polyurethane resin
  4. Isocyanate
  5. A catalyst
  6. A foaming agent

Step 2: Measure out the ingredients

The ratio of ingredients needed to make expanding foam varies depending on the desired consistency and expansion rate. A common ratio is 2 parts polyurethane resin to 1 part isocyanate and a small amount of catalyst and foaming agent.

Measure out the ingredients using a mixing container or a measuring cup. It is important to be precise with the measurements to ensure that the foam expands and hardens properly.

Step 3: Mix the ingredients

Pour the polyurethane resin and isocyanate into the mixing container. Use the stirring stick to mix the ingredients together until they are fully combined.

Step 4: Add the catalyst and foaming agent

Once the polyurethane resin and isocyanate are fully combined, add a small amount of catalyst and foaming agent. The exact amount of catalyst and foaming agent needed will depend on the size of the batch and the desired expansion rate.

Step 5: Stir the mixture

Stir the mixture until the catalyst and foaming agent are fully incorporated. It is important to stir the mixture thoroughly to ensure that the foam expands and hardens properly.

Step 6: Pour the foam into the desired area

Pour the foam into the area where it is needed. The foam will begin to expand as soon as it comes into contact with the air. Use a tool, such as a spatula or putty knife, to shape the foam as desired.

Step 7: Allow the foam to harden

Allow the foam to harden completely before handling or using it. The drying time will depend on the size of the batch and the desired expansion rate.

Benefits Of Expanding Foam

Expanding foam is a versatile and widely used material in construction, DIY projects, and home repairs. It is a polymer foam that expands upon application and hardens to fill gaps, cracks, and voids. Expanding foam is useful for a variety of purposes, including insulation, sealing leaks, and stabilizing structures. In this article, we will explore the many benefits of expanding foam and how it can be used in a variety of applications.

  • Insulation: One of the primary benefits of expanding foam is its ability to insulate a space. When applied to walls, attics, or crawl spaces, expanding foam can help to keep a building or home warm in the winter and cool in the summer. This can save energy and reduce heating and cooling costs. Expanding foam is also effective at blocking drafts, which can further improve energy efficiency.
  • Sealing leaks: Expanding foam can be used to seal leaks around windows, doors, pipes, and other openings. It is an effective way to prevent water damage and improve the overall energy efficiency of a building or home.
  • Stabilizing structures: Expanding foam can be used to stabilize structures, such as foundations, roofs, and walls. It is often used in situations where traditional methods of repair are not feasible, such as when access to the damaged area is limited.
  • Filling gaps and cracks: Expanding foam is an excellent material for filling gaps and cracks in walls, floors, and other surfaces. It can be used to fill small gaps and cracks as well as larger voids.
  • Durability: Expanding foam is a durable material that can withstand a range of temperatures and weather conditions. It is resistant to water, moisture, and rot, making it an ideal choice for use in damp or humid environments.
  • Easy to use: Expanding foam is easy to apply and does not require any special tools or equipment. It can be applied using a simple nozzle or applicator and hardens quickly, making it convenient to use.
  • Customizable: Expanding foam can be customized to suit specific needs and preferences. The expansion rate and consistency of the foam can be adjusted by adjusting the ratio of ingredients used to make it. This allows for a wide range of applications and allows the foam to be tailored to specific requirements.
  • Versatility: Expanding foam can be used in a wide range of applications, including construction, home repairs, and DIY projects. It is an effective material for filling gaps and cracks, sealing leaks, insulating spaces, and stabilizing structures.

Conclusion:

Making expanding foam at home is a cost-effective and customizable alternative to purchasing premade foam. With the right materials and a little bit of elbow grease, you can easily make expanding foam at home. Just follow the steps outlined in this guide and you’ll be on your way to using your very own homemade expanding foam in no time.

5 Home Renos That Add The Most Home Value

Whether you wish to improve your living space or you are going to sell your home, a home renovation will add instant value to your property. 

Many home buyers are looking for homes that are ‘move in ready’ and don’t require much or any work prior to moving in. Because of this desirability, many homeowners are deciding to make upgrades to their home to increase the resale value. If you have a number of projects in mind that are on your ‘wish list’, but aren’t sure which one to start with, you might find these suggestions helpful. 

  1. Kitchen Remodel – This is probably the biggest project that you will undergo, but the one that has the most impact. The kitchen is the most used room in a house and the central hub for most activities. Thus, it makes sense to have a kitchen that is both functional and attractive. If the cabinets are old looking and the countertops are in poor condition, it is hard to overlook. For some, a major renovation might be out of reach, but there are smaller scale options that will also work to spruce up the appearance. You can add a fresh coat of paint or even just reface the cabinetry with new wood panels and hardware. Overall, you can likely recoup 60% to 80% of the cost of the kitchen remodel. 
     
  1. Garage Door Replacement – A garage door makes a great design element to your home as it is one of the first things people see when they come to your home. Although it doesn’t always top the list of most popular projects, it should not be overlooked in terms of overall home value and curb appeal. Over 80% of Realtors believe a new garage door can impact home value – all the more reason to take on this project. 
     
  1. Fiberglass Entry Door Replacement – Nothing makes a more impactful statement than the attractiveness of your front door. Replacing the standard fiberglass entry door to something more stylized to your home will add to the ‘first impression’ element of your home. There are many attractive alternatives for a front door and finding a suitable design that goes with the home will add value straight away without having to undergo a major renovation. According to a recent study, replacing your front door has an average ROI of 75%.   
     
  1. Window Replacement – Having old windows with cracked or chipped frames greatly affects the look of your home. Potential buyers will notice them and so do appraisers. If you’ve got questions about buying new windows, get the answer from a reputable company before you buy. Replacing the windows in your home can add thousands of dollars to its market value, and with an average  ROI of up to 85%, so it makes sense to consider it as a priority upgrade option, especially if you are planning on selling in the near future.  
     
  1. Deck Addition – A wood deck addition falls on the inexpensive side of remodeling projects, but it’s one of the more valuable. In fact, some experts claim that installing a deck can increase the value of your home significantly more than if you were to add another bathroom or living room at a fraction of the cost. The overall cost of installing a deck will largely depend on the size of the deck and material you use. However, most homeowners will recoup nearly 70% of the build cost after they have sold their home.  

If you want to take on any of these home improvement projects, but don’t have the immediate cash on hand to make them a reality, then a home improvement loan might be something to consider.  

3 Best Steps To Find The Best Home Renovation Contractor For Your House |  listofinformation

What is a home improvement loan? 

A home improvement loan can be a home equity loan, a HELOC loan, or any loan using home equity used for home improvement purposes. Borrowers will typically use these types of loans to access the capital they need to build on their investment. 

According to a recent study, the value of residential mortgage loans from alternative lenders is steadily growing. Canadians are choosing to opt-out of traditional lenders’ extended waiting periods and paperwork and are finding that working with a mortgage broker is an easier, more streamlined process that saves time, effort and money. If you are a homeowner considering a renovation to your home, a reputable broker such as Burke Financial can help you with every stage of the process.